

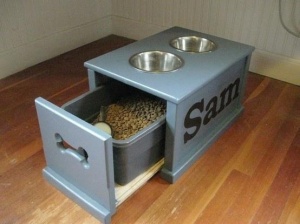
 Last week I posted a picture of a pet feeding and storage piece (on the left) on Facebook that I felt would be a GREAT DIY project to use our eco-friendly PureBond hardwood plywood on and many of you out there in my virtual network asked for plans and I am pleased to say that Cher-Ann, one of our PureBond Idea Team members from Designs by Studio C took on the challenge and created the awesome plans below for us!!! A big “Thank You” for Cher-Ann!!!!!!!!!!!
Materials:
- 1-1/4″ pocket hole screws or 1-1/4″ screws & 2″ screws
- 1-1/4″ brad nails
- 1 set of 20″ drawer slides
- 1 – 10 gallon plastic bin (measuring approximately 24″L x 16″W x 9″H)
- Finishing supplies
Lumber:
- 1 half sheet of PureBond plywood (you can buy PureBond at The Home Depot)
- 1 – 1×2 at 8′
Cut List:
- 1 – 3/4″ plywood at 16-1/2″ x 24-1/2″ – Bottom
- 1 – 3/4″plywood at 11-1/4″ x 16-1/2″ – Back
- 2 – 3/4″ plywood at 11-1/4″ x 25-1/4″ – Sides
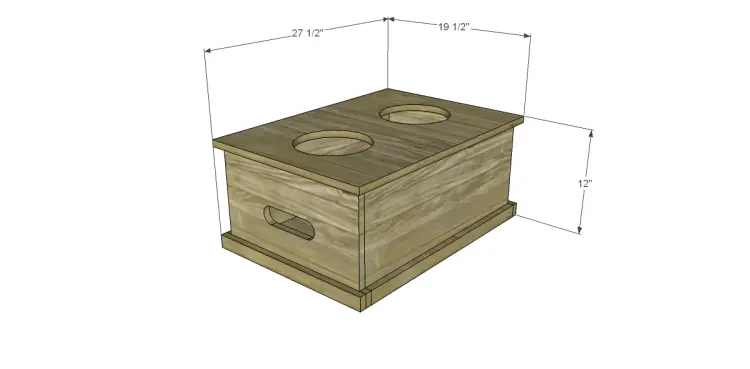
- 1 – 3/4″ plywood at 19-1/2″ x 27-1/2″ – Top
- 2 – 1×2 at 25-1/4″ – Side Trim
- 1 – 1×2 at 19-1/2″ – Back Trim
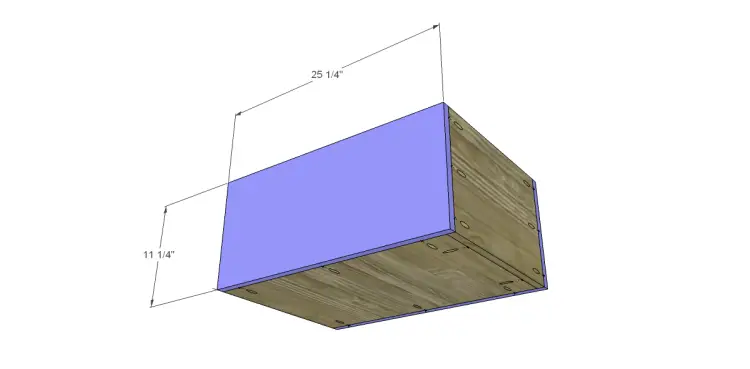
- 1 – 3/4″ plywood at 11-1/8″ x 18″ – Drawer Front
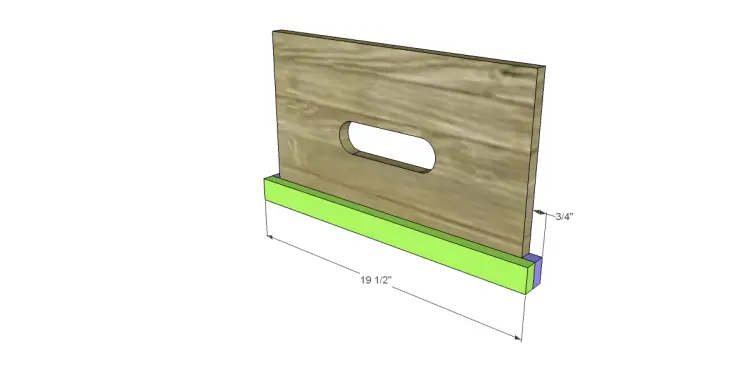
- 1 – 1×2 at 19-1/2″ – Drawer Front Trim
- 2 – 1×2 at 3/4″ – Drawer Front Side Trim
- 1 – 3/4″ plywood at 17″ x 24″ – Drawer Base
The organizer can be assembled using pocket holes and pocket hole screws, or countersunk screws.
1. Cut the pieces for the bottom and the back. If using the pocket hole method, drill pocket holes in the bottom and back as shown. Attach the back to the bottom using glue and 1-1/4″ pocket hole screws.
If using the countersunk screw method, attach the back to the bottom using glue and countersunk 1-1/4″ screws.

2. Cut the pieces for the sides. Attach to the bottom and back using glue and 1-1/4″ pocket hole screws or 1-1/4″ countersunk screws.
3. Cut the piece for the top. Draw a line marking the center of the piece lengthwise and make a mark at the center of this line. Measure from the mark at the center to the end of the board (along the line already drawn) and make a mark for the food dish position. Repeat for the other side of the line. Measure the overall diameter of the pet food dishes, minus the measurement for the lip. Draw two circles on the top at the marks on either side of the center line and cut out using a jigsaw. Check the fit of the food dishes and adjust if necessary.
Attach the top using glue and 1-1/4″ brad nails. the back and sides will overhang by 3/4″, while the front edge (where the drawer will be) overhangs by 1-1/2″.

4. Cut the pieces for the trim. Attach the trim at the sides first, using glue and 1-1/4″ brad nails, then attach the back trim piece.

5. Cut the pieces for the drawer front and the trim. Mark the position for the “handle”. Cut the holes using a 2″ hole saw, then draw lines at the top and bottom of the holes to connect the two. Cut out with a jigsaw.
Attach the small pieces of trim to the sides of the drawer front using glue and 1-1/4″ brad nails, then attach the front trim piece.

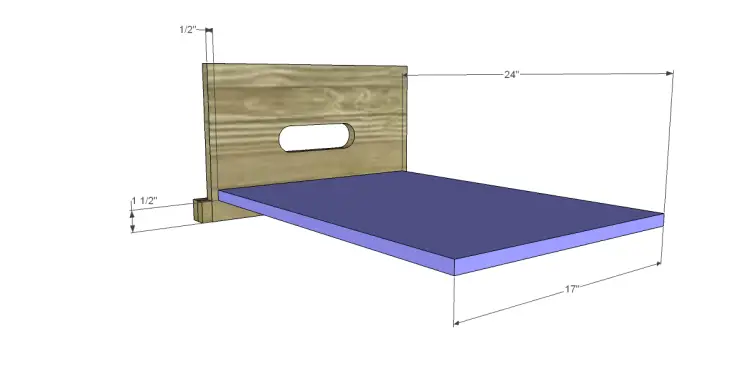
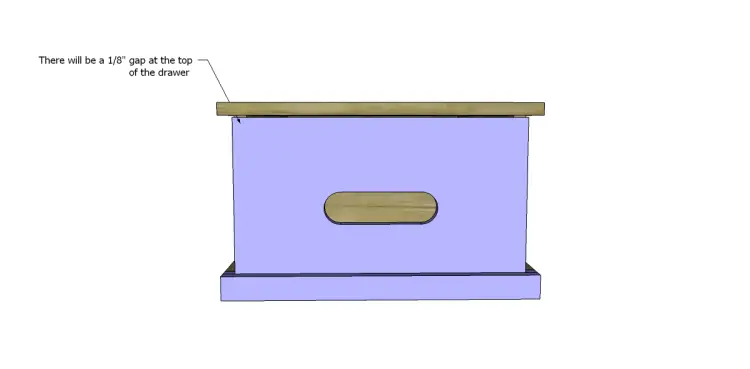
6. Cut the piece for the drawer base and drill pocket holes in one of the shorter edges. Position the base 1-1/2″ above the bottom of the drawer front, and 1/2″ from the sides as shown and secure using 1-1/4″ pocket hole screws.
If using the countersunk screw method, position the drawer base in the same manner, and secure using countersunk 2″ screws through the drawer front into the base.
Install the drawer slides according to the manufacturer’s installation instructions. Make any necessary adjustments.
Finish as desired, and place the bin on the drawer.


